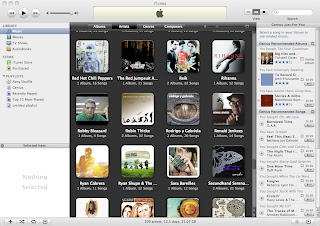
 Today is probably my last post for a little while about music. Today is all about music management. Music management is important because it leads to better organization. The better your music is organized, the easier it is to navigate your music and enjoy it. So that seems pretty simple to understand, lets learn some simple ways we can manage our music. Basically, this post is a crash course on using iTunes. It contains information and small tutorials that I think are good for new and old users alike. A lot of people have been using iTunes for years and years and don't know some of the simple wonders it can do!
First things first
You need to be letting iTunes manage your music for you. This sounds strange. It won't actually manage your music beyond organizing it into folders for you. YOU will be doing the management BUT you will be doing it through iTunes which is the easiest way I know to organize and manage your tunes. To turn this feature on:
- go to Preferences (or Settings)
- go to the Advanced Tab
- Make sure that the "Keep iTunes folder organized" box is checked
- Make sure that the "Copy files to iTunes Music folder when adding to library" box is checked.

Now that its managing your music, let me explain something. iTunes will now copy any music you add to your iTunes Library to the iTunes Music folder where it will be managed. So if you buy something from iTunes, that music will be put directly into your iTunes folder. If you rip a CD using iTunes, that CD will also be placed directly in your iTunes folder - you don't have to worry about those. IF, however, you have music that you got from a backup device or from a friend or whatever, that music will be COPIED to the iTunes music folder, meaning two copies will exist once you add it to your music library: the one in your iTunes Music folder and the original. The BEST way to add music that is in a format like this is: simply grab and drag the folders where the music is and drop it in the iTunes window. You will see iTunes process it and then it will show up on your screen.
At this point, you no longer need the original to play the music in iTunes because it is IN iTunes. So, unless that folder is on a backup device, you can delete it becuase you have a copy of it in your iTunes folder and you will be managing it through iTunes. All the music you have will now be stored SOLEY in your iTunes Music Library. It can be easily retrieved from that location, so don't worry, iTunes didn't steal it from you.
Managing your music
The next thing to explain is that ANY changes you make to your music in iTunes (i.e. track name, number, genre, etc) will be made TO THE FILE ITSELF. This means that your album art will be saved as well. Now, lets talk about editing a song, songs, or album information.
- First, information can be edited on any level: song-by-song, songs-by songs, album-by-album, albums-by-albums, etc.
- You can click on one or many songs or albums and press Command+i (Mac) or Control+i (PC).
- You can also right click and select Get Info. Either way, this brings up the song's information.
- You can edit this information by exploring any of the tabs.
- The most common change I make is highlighting multiple songs or albums, editing the info, and changing the genre of that music so it is all Rock, for example.
- Another common change you might need to make is to distinguish an audiobook from music. To do this, press command (control) + i on the should-be book, select the "option" tab, and change the "Type" to "audiobook."
Album Art
 The last thing I want to talk about is Album Art. If you have music in you iTunes library that doesn't have album art (i.e. the album in "album view" shows up as a question mark) then you are missing out on one of the best aesthetic feautures of iTunes. To remedy this:
- first try right clicking the album and selecting "Get Album Artwork." Thats the easy and obvious way.
- If the artwork doesn't show up, its becuase the album is titled in some way that iTunes is not able to recognize. Album art works based on album titles. You should try going to the iTunes store to find that album and see what it is called in iTunes.
- Change the name of the album by clicking on it or all the songs in it and pressing command (control) + i. Then change the album title. That should do the trick (make sure you right click and select "Get Album Artwork" again).
- If not, then the last method is a sure fire way. Simply google the album,
- go to images,
- find an image that matches the album,
- save it to your desktop,
- highlight all the music that should have that image,
- then drag and drop the image into the bottom left corner window that says "Drop Image Here" or something like that.

Well, thats it for today. I know it was a lot of reading but I hope you are now an expert on the basic iTunes music managment techniques!


2 comments:
Lots of good info in there. Good post.
Agreed. I think your head is full of good info.
Post a Comment